Contract Setup and Completion is a simple 7 step setup wizard to create a contract.
Once a screen has been completed, use the blue arrow in the bottom right-hand corner to move to the next step, this will then save the previous step completed allowing you to exit the wizard and come back later to continue.
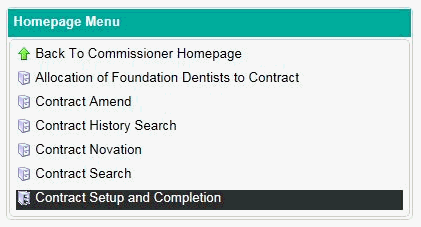
From the Home page select the Contract folder…

Then click on Contract Setup and Completion.

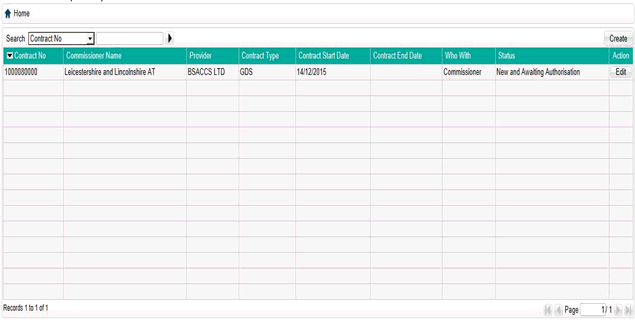
You will then be met with the screen below
To create a new contract; select the Create button on the top right hand side of the table.
If the contract you are creating has already been saved this will appear in the grid below. To access a contract part way through creation click on the ‘Edit’ button in the ‘Action’ column.

Contract Details
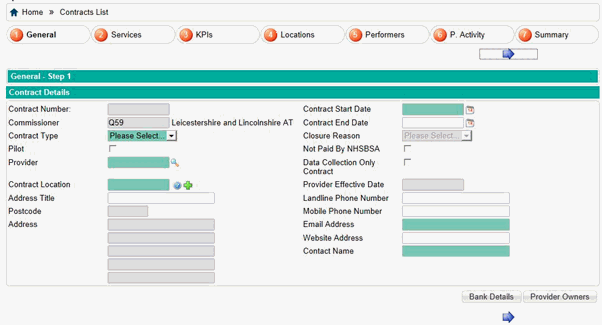
The contract details screen is the area in which you can specify the type of contract you wish to create.

Mandatory Fields
Contract Type – use the
drop down box to select as required. Please
Note: If PDS or PDS Plus is selected then the KPIs section of the
set up wizard will become mandatory to complete.
Provider – enter a Provider number or use the magnifying glass to search.
For further information on creating a new Provider number please see the Provider and User Update help screen.
Contract
Location –
Enter an existing location
ID. You can use the green plus to search for an existing location
ID or create a new one
Contract Start Date – The contract
start date must fall on or after the start date for the Provider selected.
Email Address – This
will be used as a correspondence email address for the Contract.
Contact Name